Quick Start Guide
DayOne Writeback Agent Installation
DayOne Writeback Agent setup is found on the Settings page of DayOne portal
1. Create an Azure AD application for the DayOne Writeback agent.

2. Select Authentication

3. Please select “Access tokens” ,“ID tokens”

4. Select API permissions
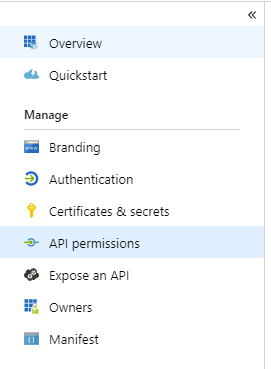
5. Select Add permissions

6. Select Microsoft Graph

7. Select Application permissions

8. Select User.Read.All

9. Select Grant admin consent for<YourAppName>

10. Select Certificates & secrets

11. Select New client secret

12. Enter description and select expiration

13. Copy the secret value

14. Create an Organizational Unit (OU) in Active Directory where mail-enabled user objects will be created by the agent and copy this OU’s distinguished Name
15. Exclude this Organizational Unit from Azure AD Connect Synchronization
16. Create an administrative account with the following permissions to in this OU: create + delete + modify user objects
17. Start the installation: “DayOne Writeback Agent Setup.msi”
18. In the Set Service Login write the credentials for the user created in step 16

19. Edit the service configuration file located in: "C:\Program Files (x86)\DayOne Write Back Service\DayOne WritebackAgent.exe.config"
20. Set the following parameters in the “DayOne Writeback Agent.exe.config” file:

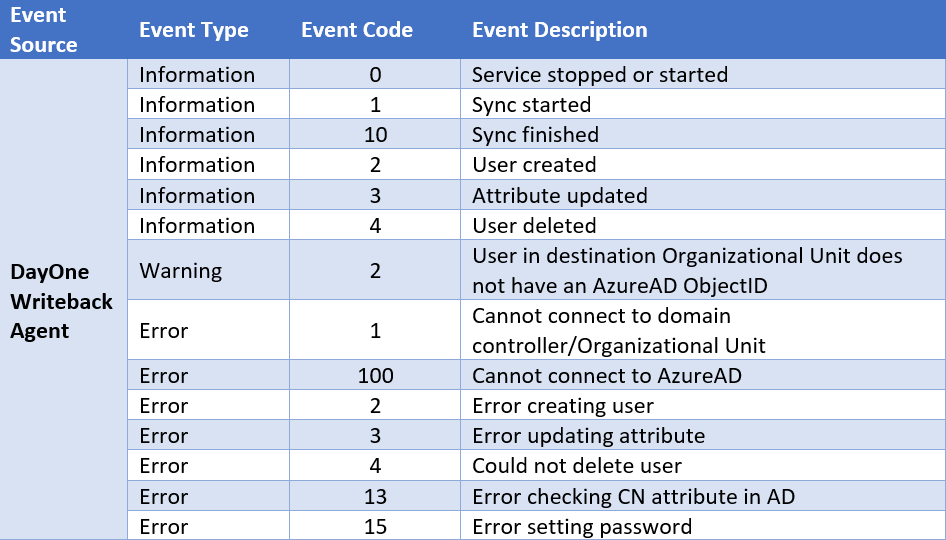
21. Following is a description of the DayOne Writeback Agent service events in Windows Event Viewer
Contact Us
If you have any questions about this, please contact us:
By email: support@pro-vision.us